Tag: blog

  • DAW-some Discoveries: Checking Out a New DAW

    DAW-some Discoveries: Checking Out a New DAW

    A New DAW-n in Music Production

    Think your current DAW setup is flawless? Think again. The world of music production is evolving at a tempo even your fastest BPM can’t keep up with. Gone are the days when you had to wrestle with clunky interfaces, limited tracks, and enough cables to make a sound engineer weep. The future of Digital Audio Workstations (DAWs) is here, and it’s rewriting the rules of recording, mixing, and mastering.

    Imagine a DAW that adapts to your workflow, integrates seamlessly with your hardware, and—dare we say—makes music production actually fun. Whether you’re a seasoned engineer or just unboxing your first MIDI keyboard, understanding the latest innovations can elevate your craft from “meh” to “mix-master.” Let’s dive into what makes today’s DAWs so DAW-some.


    Smarter, Faster, More Creative: The Evolution of DAWs

    If you’re still using one from a decade ago, you’re essentially producing with a flip phone in the age of smartphones. Modern DAWs aren’t just about laying down tracks—they’re designed to enhance creativity, optimize workflow, and deliver studio-grade results with fewer headaches.

    Key Innovations Changing the Game:

    🎛 AI-Assisted Mixing & Mastering – Think of AI as your assistant engineer (minus the coffee breaks). Advanced DAWs now offer AI-driven EQ, compression, and mix suggestions, saving you hours of fine-tuning.

    ☁️ Cloud Collaboration – No more ‘final_final_mix_3_THISONE.mp3’ email threads. Work seamlessly with artists and engineers worldwide directly.

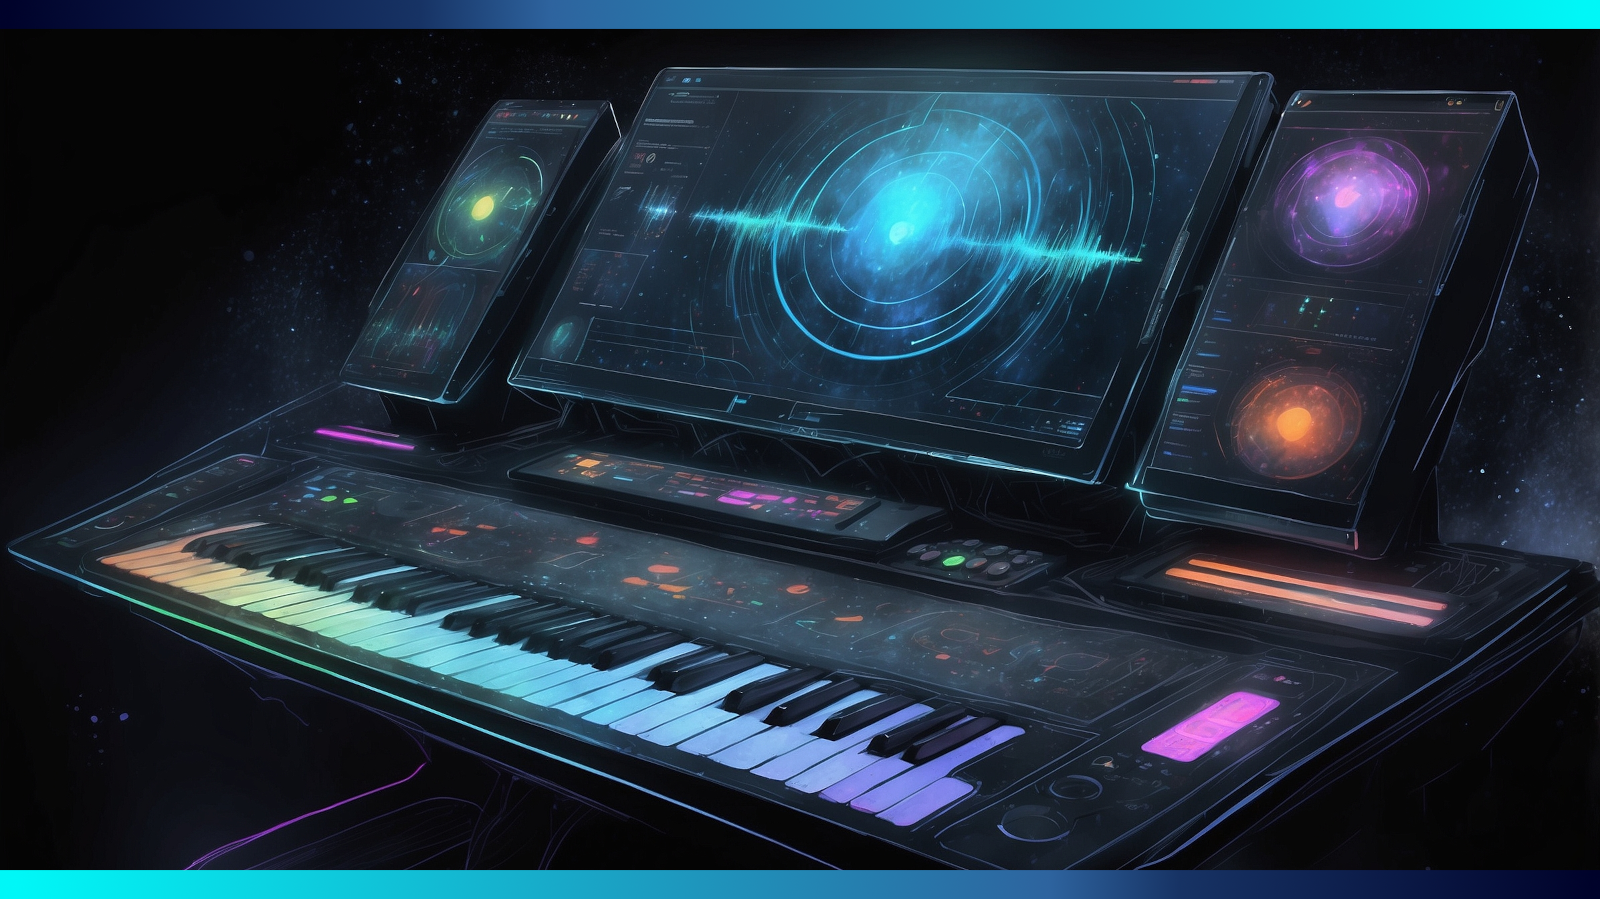
    🖥 Touchscreen & Multi-Screen Support – Dragging sliders with a mouse? So last century. Multi-screen and touchscreen integration give you a tactile, hands-on approach.

    🎤 Seamless Hardware Integration – Leading platforms like Audio Mixing Platform (AMP) by New Life Electronics (NLE) take compatibility to the next level, effortlessly working with ASIO, Dante, and AES67 network technologies for high-speed, low-latency performance.

    🎶 Immersive Audio Support – With 3D and spatial audio becoming mainstream, DAWs are now equipped to handle Dolby Atmos, Ambisonics, and other immersive formats.


    Pro Tips for Mastering the DAW Revolution

    ✅Stay Updated – New features roll out faster than plugin sales. Keep your software updated to stay ahead of the curve.

    ✅Customize Your Workflow – Tailor hotkeys, macros, and templates to fit your production style and save valuable time.

    ✅Experiment with AI – Use AI-assisted tools to enhance your mixes, but trust your ears over algorithms.

    ✅Leverage Cloud Storage – Back up your projects to the cloud so you never lose that ‘perfect take.’

    ✅Integrate the Right Hardware – Use expandable I/O interfaces, control surfaces, and networked audio gear to unlock the full potential.


    Glimpse of a DAW interface

    The Future is DAWsome – Are You Ready?

    Music production is no longer limited by clunky software or outdated workflows. With AI, cloud collaboration, and intuitive integration shaping the future, there’s never been a better time to upgrade your game. Whether you’re an industry pro or a bedroom producer, these innovations will keep your creativity flowing and your mixes sounding better than ever.

    Ready to optimize your setup? Let’s talk gear and solutions!

    For deep-dive sound engineering training, check out SynAudCon’s industry-leading courses and take your skills to the next level.

  • Mic Myths Busted: The Truth About Studio Sound Quality

    Mic Myths Busted: The Truth About Studio Sound Quality

    Separating Fact from Fiction in Studio Microphones Mic Myths

    Ever heard someone say, “Expensive mics always sound better” or “Condenser mics are the only choice for vocals”? These common misconceptions can lead to poor buying decisions and missed opportunities for achieving the best sound. The wrong choice might even cost you more in time and money. Let’s cut through the noise and debunk the biggest mic myths about studio microphones.


    Myth #1: Mic Myths Would Have You Think Price Equals Quality

    The Truth: While premium microphones offer superior craftsmanship and consistency, price alone doesn’t guarantee the best sound for your specific needs. Some budget-friendly options deliver incredible performance, especially when paired with the right preamp and environment.

    Pro Insight: Many professional studios use the iconic Shure SM57—an affordable dynamic mic—for instruments and even vocals. It’s proof that proper mic technique often matters more than price.


    Myth #2: Condenser Mics Are Always Better for Vocals

    The Truth: Condenser mics capture detail and brightness, making them a great choice for many vocal styles. However, dynamic microphones like the Shure SM7B are often preferred for aggressive vocals, podcasting, and broadcast applications due to their durability and natural warmth.

    Quick Tip: Test both condenser and dynamic mics with your voice type before committing. Your mic choice should complement your unique tone and the mix.


    Myth #3: More Sensitivity Means a Better Recording

    The Truth: High sensitivity isn’t always a good thing. A highly sensitive mic will pick up everything—including unwanted room noise. In untreated rooms, a lower-sensitivity mic can actually provide a cleaner, more controlled recording, even lowering the noise floor.

    Gear Tip: If your recording space isn’t acoustically treated, opt for a cardioid dynamic mic to minimize background noise and reflections.


    Myth #4: You Can Fix Everything in the Mix

    The Truth: While modern plugins and post-processing tools are powerful, they can’t fully correct a poorly recorded track. A bad mic choice, improper positioning, or excessive background noise will always limit your final sound quality.

    Pro Insight: Focus on getting the best raw recording possible. Proper mic placement, gain staging, and selecting the right microphone will save you hours of frustrating mixing later.


    Myth #5: Mic Myths Says USB Mics Aren’t Professional

    The Truth: While USB microphones have limitations, they have improved significantly in recent years. Models like the Audio-Technica AT2020USB+ and Rode NT-USB offer professional-grade sound quality, making them excellent choices for home studios, podcasting, and remote recording.

    Quick Tip: If you’re using a USB mic, consider an external pop filter and acoustic treatment to enhance clarity and warmth.


    Mic Myths busted

    Final Thoughts: Get the Best Sound with the Right Knowledge

    Now that these mic myths are busted, you can make smarter decisions when choosing and using studio microphones. You can tell Mr. Mic Myths you’ll make up your own mind. Whether you’re looking for the best mic for your next project or need expert advice on optimizing your recording setup, we’re here to help.

    Want expert sound engineering solutions? Book a consultation today!

    Looking for top-tier rental equipment? Explore our gear options!

    Ready to level up your audio skills? Check out SynAudCon’s training courses.

  • Renting vs. Buying Audio Gear: What’s the Best for You?

    Renting vs. Buying Audio Gear: What’s the Best for You?

    The Big Question: Should You Rent or Buy Audio Equipment?

    Every audio professional, from gigging musicians to event organizers and sound engineers, faces the same dilemma: Should you invest in your own audio gear, or is renting the smarter move? The answer to renting vs. buying depends on your needs, budget, and long-term plans. Let’s break it down so you can make the best decision for your setup.


    Renting vs. Buying: When Renting Audio Gear Makes Sense

    Renting audio equipment is often the best choice if you need high-end gear for a short-term project or an event. It provides access to top-tier equipment without the upfront investment, making it ideal for temporary or occasional audio gear needs.

    Benefits of Renting:

    • Cost-Effective for Short-Term Use – Renting saves money if you don’t need gear regularly.
    • Access to High-End Equipment – Get the latest technology without spending thousands upfront.
    • No Maintenance Hassles – Rental companies handle repairs and maintenance.
    • Flexibility for Different Gigs – Different events call for different gear. Renting allows easy customization.

    Pro Tip: Renting is a great option if you’re working on one-off events like weddings, corporate gigs, or festivals where high-quality sound is essential but ownership isn’t practical.


    Renting vs. Buying: When Buying Audio Gear is the Right Move

    If you’re a professional sound engineer, band, or production company using audio equipment frequently, purchasing might be the better long-term investment. Owning your audio gear can save money in the long run and gives you complete control over your setup.

    Benefits of Buying:

    • Long-Term Savings – If you use gear regularly, buying is more cost-effective over time.
    • Familiarity with Your Setup – Using the same equipment consistently leads to a more polished, professional sound.
    • No Rental Hassles – Avoid last-minute availability issues or rental fees adding up.

    Pro Insight: If your work involves frequent gigs, buying staple items like microphones, speakers, and mixers may be a worthwhile investment while still renting specialty equipment as needed.


    Audio Gear Renting vs. Buying

    Renting vs. Buying: What’s the Best Choice for You?

    Choosing between renting and buying depends on:

    1. Frequency of Use: If you need audio gear regularly, buying makes sense. If not, rent.
    2. Budget: Rentals require lower upfront costs, while buying pays off long-term.
    3. Storage & Maintenance: Owning means responsibility for storage, upkeep, and repairs.
    4. Equipment Needs: If your gear needs frequently change, renting is the more flexible option.

    Quick Tips for Making the Right Choice with Renting vs. Buying Audio Gear

    ✅Start Small – If you’re unsure, rent first to test equipment before committing to a purchase.

    ✅Consider Hybrid Solutions – Buy essential gear and rent specialized equipment as needed.

    ✅Think About Future Needs – If your gigs are expanding, ownership might be more beneficial.


    Final Thoughts & Your Next Step

    Both renting and buying audio gear have their advantages, and the right decision depends on your specific needs. Whether you need top-tier rental equipment for your next event or expert consultation on what to buy, we’ve got you covered.

    For those looking to deepen their audio expertise, check out SynAudCon’s training courses to take your skills to the next level!

  • Signal Flow 101: The Backbone of a Great Audio Setup

    Signal Flow 101: The Backbone of a Great Audio Setup

    Why Signal Flow Matters More Than You Think

    Ever had a live show go south because of unexpected audio issues? Or spent hours in a studio troubleshooting a signal chain? The problem often boils down to one critical concept: signal flow. Understanding how audio moves through your system is the difference between a seamless mix and a chaotic mess.

    Whether you’re running a live sound rig, a broadcast setup, or a studio environment, mastering signal flow will make your workflow more efficient, your troubleshooting faster, and your overall sound cleaner. Let’s break it down.


    1. What Is Signal Flow?

    Signal flow is the path that audio takes from the source (like a microphone or instrument) to the final output (such as speakers or a recording device). Every cable, processor, and mixer in between plays a crucial role.

    A typical live sound signal flow looks like this:

    • Source (Microphone, Instrument, Playback Device)
    • Preamp (Boosts weak signals to usable levels)
    • Mixer/Console (Routes and processes audio)
    • Processing (EQ, Compression, Effects)
    • Amplifiers (Boosts signal strength for speakers)
    • Speakers (Final output to the audience)

    In a studio, the flow might include audio interfaces, DAWs, and monitor controllers, while a broadcast setup may add streaming encoders and signal distribution networks.


    2. How to Optimize the Signal Chain for Clean, Clear Audio

    🔹Gain Staging is Everything One of the most critical aspects of signal flow is gain staging—setting appropriate levels at each stage to prevent distortion and noise. Start with a strong but clean signal from your source and make sure each step maintains the right balance.

    🔹Keep Your Signal Path Clean

    • Use balanced cables (XLR, TRS) to reduce noise.
    • Avoid unnecessary signal processors that add latency.
    • Organize your cables to prevent signal interference.

    🔹Use Submixes for Efficiency Grouping instruments or vocal sections into submixes before sending them to the main mix can give you better control and clarity. This is especially useful in live sound where quick adjustments are needed.


    3. Common Signal Chain Mistakes (and How to Fix Them)

    ❌Plugging Outputs into Outputs → Always match inputs to outputs to prevent signal loss.

    ❌Ignoring Latency in Digital Setups → When using Dante, AES67, or ASIO-based systems, monitor for latency buildup.

    ❌Skipping Proper Grounding → A poorly grounded system can introduce hum and interference into your mix.

    🔹Pro Tip: Want to dive deeper into system grounding and noise reduction? Check out SynAudCon’s training courses for expert guidance.

    Get better signal flow from training with SynAudCon

    4. Building a Reliable Signal Chain for Any Setup

    Whether you’re running a small club PA system or a high-end studio, setting up your signal chain properly ensures consistency and reliability.

    Live Sound Example: 🎤 Mic → Preamp → Mixer (EQ & Compression) → Amplifier → Speakers

    Studio Setup Example: 🎸 Instrument → DI Box → Audio Interface → DAW → Plugins → Monitors

    By mastering these setups, you’ll be able to quickly adapt to any audio environment.


    Final Takeaway: Master Signal Flow, Master Your Mix

    Understanding and optimizing signal flow isn’t just for sound engineers—it’s for anyone serious about great audio. Whether you’re troubleshooting a bad mix, setting up a new system, or fine-tuning your live rig, getting this right saves time, reduces stress, and delivers better sound.

    📞Need a consultation on your sound setup? Contact us today and let’s optimize your audio system for peak performance!

  • Master Live Gigs: The Best Skills Home Producers Have

    Master Live Gigs: The Best Skills Home Producers Have

    Making the Leap from Home Studio to Live Production

    You’ve spent countless hours fine-tuning your craft in your home studio—perfecting EQ curves, dialing in compression, and layering tracks with precision. But what happens when you step into live gig production? Live production is a whole different beast, demanding quick thinking, adaptability, and technical expertise. The good news? Many of the best skills you’ve honed in your home setup can translate seamlessly to live audio.

    Let’s explore the key takeaways from home production that can give you a competitive edge in live sound.


    1. Gain Staging: A Universal Best Skill

    One of the most critical fundamentals in both studio and live sound is gain staging—ensuring proper input levels at every step of the signal chain. Whether you’re tracking in a DAW or mixing a live band, the goal remains the same: optimize levels to avoid distortion while keeping the noise floor low.

    🔹 Studio Skill: Setting proper input gain for clean recordings.

    🔹 Live Translation: Balancing preamp levels to prevent feedback and maintain headroom.

    Pro Tip: When mixing live, leave more headroom than you would in the studio—unexpected peaks can easily distort your mix in a high-pressure environment.


    2. EQ and Frequency Management: Mixing in Real-Time

    In the studio, you have the luxury of surgical EQ adjustments and unlimited tweaks. Live, you must make fast, effective decisions to shape the mix.

    🔹 Studio Skill: Crafting a balanced frequency spectrum over time.

    🔹 Live Translation: Cutting problem frequencies instantly to avoid feedback and muddiness.

    Pro Tip: Learn to use parametric EQs quickly and efficiently—cut before boosting and sweep for problem frequencies.

    🔹 Further Learning: Dive into frequency management with SynAudCon’s training programs to sharpen your live EQ skills.

    To get more of the best skills, check SynAudCon out!

    3. Compression and Dynamics: One of the Best Skills for Taming the Live Chaos

    Home producers love compression for gluing a mix together and controlling transients. In live sound, compression is crucial, but misusing it can kill the energy of a performance.

    🔹 Studio Skill: Applying compression for consistency and balance.

    🔹 Live Translation: Using compression carefully to control dynamic range without squashing the natural feel of live instruments and vocals.

    ✅ Pro Tip: For live vocals, use a gentle ratio (3:1 to 4:1) with a slow attack to keep things natural without over-compressing.


    4. Routing and Signal Flow: Mastering the Tech is Another of Your Best Skills

    Your knowledge of buses, aux sends, and signal routing in the DAW translates directly to understanding live mixing consoles.

    🔹 Studio Skill: Sending tracks to effects buses for reverb and delay.

    🔹 Live Translation: Using aux sends for monitor mixes, effects processing, and submixes in a fast-paced environment.

    ✅ Pro Tip: Get hands-on experience with live consoles before the gig—each brand has its own workflow quirks.


    5. Critical Listening and Adaptability is One of the Best Skills You Have

    Perhaps the most vital skill a home producer brings to live production is the ability to listen critically and adapt on the fly. In the studio, you fine-tune details over time. In live sound, you must make instant decisions to compensate for room acoustics, crowd noise, and unpredictable performance variations.

    🔹 Studio Skill: Fine-tuning tracks over multiple playback systems.

    🔹 Live Translation: Quickly identifying mix issues and adjusting in real-time.

    ✅ Pro Tip: Train your ears by mixing in different environments—practice EQ adjustments in challenging acoustic spaces to prepare for unpredictable venues.


    Final Takeaway: Your Home Studio Skills Are Your Secret Weapon

    Transitioning from home production to live sound doesn’t mean starting from scratch. Your knowledge of gain staging, EQ, compression, routing, and critical listening gives you a massive head start. The are some of the best skills that crossover into the live environment. The key is to adapt your workflow to the fast-paced, high-pressure nature of live audio.

    📞 Need a professional live mix engineer? Contact us today to book a consultation!

  • The Best Tips for Ensemble Balance in Live Performance

    The Best Tips for Ensemble Balance in Live Performance

    Vocal Focus and Register Management in Large Group Ensemble Balance

    As a live performance sound engineer, providing balance to the sound of a large ensemble is both a science and an art. Ensemble balance is managing multiple actors and/or vocalists on stage. Knowing when each character’s voice must be heard clearly at the right moments, maintains a harmonious overall mix. This challenge often comes down to group bussing, gain management, and register balancing. In this article, we’ll explore the best practices for achieving clarity, focus, and dynamics in live ensemble performances.

    Understanding the Role of Group Bussing in Ensemble Balance

    Group bussing is one of the best tools at your disposal for managing large ensembles. By grouping multiple vocal channels into a single bus, you gain centralized control over their combined volume, EQ, and effects. This simplifies your workflow and ensures consistency across similar voices or roles.

    Best Practices for Group Bussing:

    1. Organize by Role or Function: Assign actors or vocalists to buses based on their roles—for example, by lead characters, supporting characters, and chorus. This kind of bussing helps so that you can quickly adjust levels and dynamics for each group during the performance.
    2. Use Submixes for Complex Arrangements: For particularly large ensembles, you can also consider creating submixes for specific sections (e.g., altos, tenors, baritones) and then to route those into a master bus. This approach allows for finer control and the best balancing flexibility.
    3. Apply Effects Strategically: Use subtle reverb or delay on group buses to create depth and cohesion without overwhelming the clarity of individual voices.

    Balancing Gain and Volume for Vocal Registers in Ensemble Balance

    One of the most challenging aspects of live sound for large ensemble balance is managing the gain and volume across varying vocal registers. Actors and vocalists have different tonal qualities and dynamic ranges, which can create imbalances if not managed carefully. The goal is to bring out each character’s voice at the most appropriate time all the while maintaining an even mix.

    Best Practices for Gain and Volume Control:

    1. Set Proper Gain Staging: During soundcheck, make sure you optimize each microphone’s gain. The signal should be strong enough to avoid noise but not so high that it risks clipping. Proper gain staging is the foundation for the best sound clarity.
    2. Use Compression Thoughtfully: Apply compression to even out dynamic differences between vocalists. For leads or soloists, use a lighter compression ratio to retain expressiveness. For ensemble groups, more aggressive compression can help create a unified sound.
    3. Automate Fader Levels: For complex performances, use scene recalls or automation to preprogram fader adjustments for key moments. This ensures the best vocal balance without needing constant manual intervention.

    Achieving Vocal Focus

    In large ensembles, vocal focus refers to ensuring the audience’s attention is drawn to the right voice at the right time. This is especially important in theatrical productions, where the story hinges on dialogue and character interactions. The clarity of those interactions are crucial in the audio. Ensemble balance can be tricky to setup and maintain, but here are some ideas to help you.

    Best Practices for Vocal Focus:

    1. Prioritize Lead Vocals: Use EQ and volume adjustments to make lead vocals stand out. For example, boost midrange frequencies to enhance vocal intelligibility and presence.
    2. Duck Background Vocals: Sidechain compression is an excellent technique for momentarily lowering the volume of background vocals or instruments when lead vocals are active. This ensures the best clarity for critical lines.
    3. Layer with Panning: Use panning to create spatial separation between voices. Placing supporting vocals slightly off-center can help leads remain the focal point while maintaining a full stereo image.

    Managing Register Balance

    Different vocal registers—such as soprano, alto, tenor, and bass—present unique challenges in a mix. Higher registers dominate if not controlled and lower registers get lost in the overall sound. Maintaining ensemble balance is crucial to giving room to each register and voice.

    Best Practices for Register Balancing:

    1. EQ for Register Clarity: Use EQ to carve out space for each register. For example, roll off low frequencies on sopranos to avoid muddiness and add warmth to basses by boosting low-mid frequencies. Strive for the best tonal separation.
    2. Adjust Dynamics per Register: Set compression thresholds and ratios based on the dynamics of each register. Softer voices may need more compression to maintain consistency, while naturally powerful voices require less.
    3. Consider Register Overlap: Be mindful of overlapping frequencies between registers. Use narrow EQ cuts to minimize conflicts and maintain the best definition for each voice.

    Common Challenges and Solutions

    1. Mic Bleed: In ensemble settings, microphones can pick up unwanted sounds from nearby sources. Use directional microphones and careful placement to minimize bleed.
      • Solution: High-pass filters can help reduce low-frequency bleed, and gates can be used to suppress unwanted noise.
    2. Stage Dynamics: Actors and vocalists may move unpredictably, affecting microphone pickup and balance.
      • Solution: Use wireless microphones with consistent polar patterns and monitor levels closely throughout the performance.
    3. Feedback Control: Large ensembles increase the risk of feedback due to the number of open microphones.
      • Solution: Use feedback suppressors and carefully manage microphone gain to maintain the best balance between volume and stability.

    Conclusion

    Balancing large ensembles for vocal focus and register is a demanding but rewarding aspect of live performance sound engineering. Ensemble balance is an art that is structured in several skills. By mastering group bussing, optimizing gain and volume, and focusing on vocal clarity, you can deliver the best audio experience for both performers and audiences. With preparation, practice, and the right tools, you’ll elevate every performance to its fullest potential, ensuring that every voice is heard at its best.

    We can help you work out a system or train your team to handle ensemble balance. Contact us to make your next performance your best!

  • Mastering Channel Control for the Best Live Performance

    Mastering Channel Control for the Best Live Performance

    In the fast-paced world of live performances, sound engineers carry the vital responsibility of ensuring that every note, lyric, and sound effect reaches the audience in perfect clarity. A cornerstone of this craft is mastering channel control — an essential skill for creating a balanced and immersive audio experience. Whether you’re managing a rock concert, a theatrical production, or a corporate event, channel control is the key to unlocking the full potential of your stage elements and delivering the best possible audio experience.

    What Is Channel Control?

    Channel control refers to the management of individual audio channels on a soundboard or digital mixer. Each microphone, instrument, and playback device connected to the sound system is assigned a channel, giving the engineer precise control over its volume, EQ (equalization), dynamics, and effects. By fine-tuning these parameters, sound engineers can ensure that every element of a performance sounds cohesive and professional, providing the best auditory experience for the audience.

    Why Channel Control Matters for Live Performances

    Live performances are dynamic and unpredictable, requiring sound engineers to adapt to changing conditions on the fly. Mastering channel control can enable several things:

    1. Clear Vocal Presence: Ensuring that vocals cut through the mix is crucial for audience engagement.
    2. Instrumental Balance: Avoiding clashes between instruments by managing their volume and EQ ensures a harmonious mix.
    3. On-Stage Communication: Monitoring channels allow performers to hear themselves and others clearly, enhancing their ability to perform.
    4. Adaptability: Quick adjustments to unexpected issues, such as feedback or malfunctioning equipment, minimize disruptions and maintain the best sound quality.

    Tips for Effective Channel Control

    1. Organize Your Channels Logically
      Begin by labeling each channel clearly and grouping similar elements together. For example, group vocals, guitars, percussion, and playback devices into separate sections on your mixer. This organization helps you locate and adjust channels quickly, especially in high-pressure moments, ensuring the best workflow efficiency.
    2. Utilize Submixes
      Submixes allow you to control groups of channels as a single unit. For instance, you can adjust the overall drum kit volume without tweaking individual microphones on the snare, toms, and cymbals. This technique streamlines your workflow and ensures the best overall mix quality.
    3. Optimize Gain Staging
      Proper gain staging ensures that each channel’s signal is neither too weak nor too strong. Begin by setting the input gain for each channel so it peaks just below the clipping threshold. This creates a clean, noise-free foundation for further adjustments, ensuring the best sound clarity.
    4. Apply EQ Thoughtfully
      Use equalization to carve out space for each channel in the mix. For example, cut low frequencies on vocal channels to reduce muddiness and boost midrange frequencies to enhance clarity. Avoid excessive EQ boosts, which can introduce distortion, and aim for the best tonal balance.
    5. Balance Dynamics
      Compressors and limiters are invaluable tools for managing dynamics. Use compression to smooth out variations in volume, ensuring consistency without sacrificing expressiveness. Apply limiters to prevent sudden spikes that could damage speakers or cause discomfort to the audience, delivering the best dynamic control.
    6. Incorporate Effects Tastefully
      Reverb and delay can add depth and character to your mix, but overuse can muddy the sound. Apply effects sparingly and tailor them to the performance style—a subtle reverb might suit a theatrical production, while a longer delay could enhance a guitar solo. Strive for the best balance of effects to suit the event.
    7. Monitor Continuously
      Keep an eye on your meters and listen critically throughout the performance. Headphones and in-ear monitors are essential tools for detecting issues that might not be apparent in the main mix, ensuring the best real-time adjustments.
    8. Anticipate Stage Movement
      Performers often move around the stage, affecting microphone pickup and audio levels. Anticipate these changes and adjust your channels proactively to maintain the best balance.

    Common Challenges to Mastering Channel Control and How to Overcome Them

    1. Feedback Issues
      Feedback is the bane of live sound engineers. To prevent it, use directional microphones and position them carefully to avoid pointing toward speakers. Adjust EQ to cut problematic frequencies and use feedback suppressors if necessary, ensuring the best audience experience.
    2. Unpredictable Performances
      Some performers may deviate from rehearsed positions or play louder than expected. Prepare by setting safety margins in your mix and communicating with performers during sound checks, ensuring the best readiness for surprises.
    3. Technical Failures
      Equipment can fail at the worst moments. Always have backup microphones, DI boxes, and cables on hand. Redundant systems for critical channels ensure the show goes on with the best contingency planning.

    The Future of Mastering Channel Control: Digital Mixers and Automation

    Modern digital mixers have revolutionized channel control by offering features like scene recall, remote control via tablets, and advanced processing capabilities. Scene recall allows engineers to save and recall settings for different parts of a performance, minimizing transition times. Automation tools, such as dynamic EQ and smart gain adjustments, further enhance efficiency and precision, ensuring the best technological advantages.

    Conclusion

    Mastering channel control is an indispensable skill for live performance sound engineering. By organizing your channels, optimizing settings, and adapting to challenges, you can deliver the best audio experience for both performers and audiences. Whether you’re working with a seasoned band or a theater production, a deep understanding of channel control will set you apart as a professional sound engineer. With practice, preparation, and the right tools, you can turn any live performance into an unforgettable auditory experience.

    If you would like more information, then send us a message. We would be glad to help.

  • How to Get the Best Sound in the Next Live Event

    How to Get the Best Sound in the Next Live Event

    Master the art of live event sound engineering with these expert tips.

    Great sound can make or break a live event, whether it’s a concert, play, or corporate presentation. If your audience experience is important to you, here’s how to ensure your next event sounds amazing:

    1. Choose the Right Equipment for Live Events

    Your venue size, acoustics, and event type all influence the type of equipment you’ll need. A small acoustic set may not need as much amplification. A large concert may need several layers of amplification. The number of details can get very complex with trade offs, however we can help. Check in with us and our experts can help.

    2. Position Speakers Strategically

    Poor speaker placement can lead to uneven sound especially when there are several hindrances to good sound. When placing the speakers around the venue, aim for balanced coverage that avoids echo or dead zones.

    Live event coverage considerations for placement.

    If you have an important event, then you need to have it happen smoothly and without hitches. We would be glad to give your event our best!

    3. Sound Check is Key to a Live Event

    Always schedule a thorough sound check before the event. This time is the best time to troubleshoot and fine-tune and it will make a huge difference for the actual production. Knowing how a microphone will respond to a vocalist at full voice level makes surprises much less likely then the audience will have a much better experience. We can supply expertise for you next super charged event.

    4. Hire a Professional Sound Engineer for Your Live Event

    Nothing beats having an expert on-site to monitor and adjust sound in real time when your event is live. A professional engineer has the experience to quickly identify and anticipate problems and then make the appropriate adjustments. Their experience smooths out the audience experience which makes the event great.

    🎤 Need help with your next event?
    New Life Electronics offers full-service audio engineering and equipment rental to make your event successful and successful events will make audiences return.


    If you would like some of the best Online Audio training for live events, check out SynAudCon and get better!