Audio protocol matters, because great sound shouldn’t rely on hope and guesswork.
Is Your Audio Network Holding You Back?
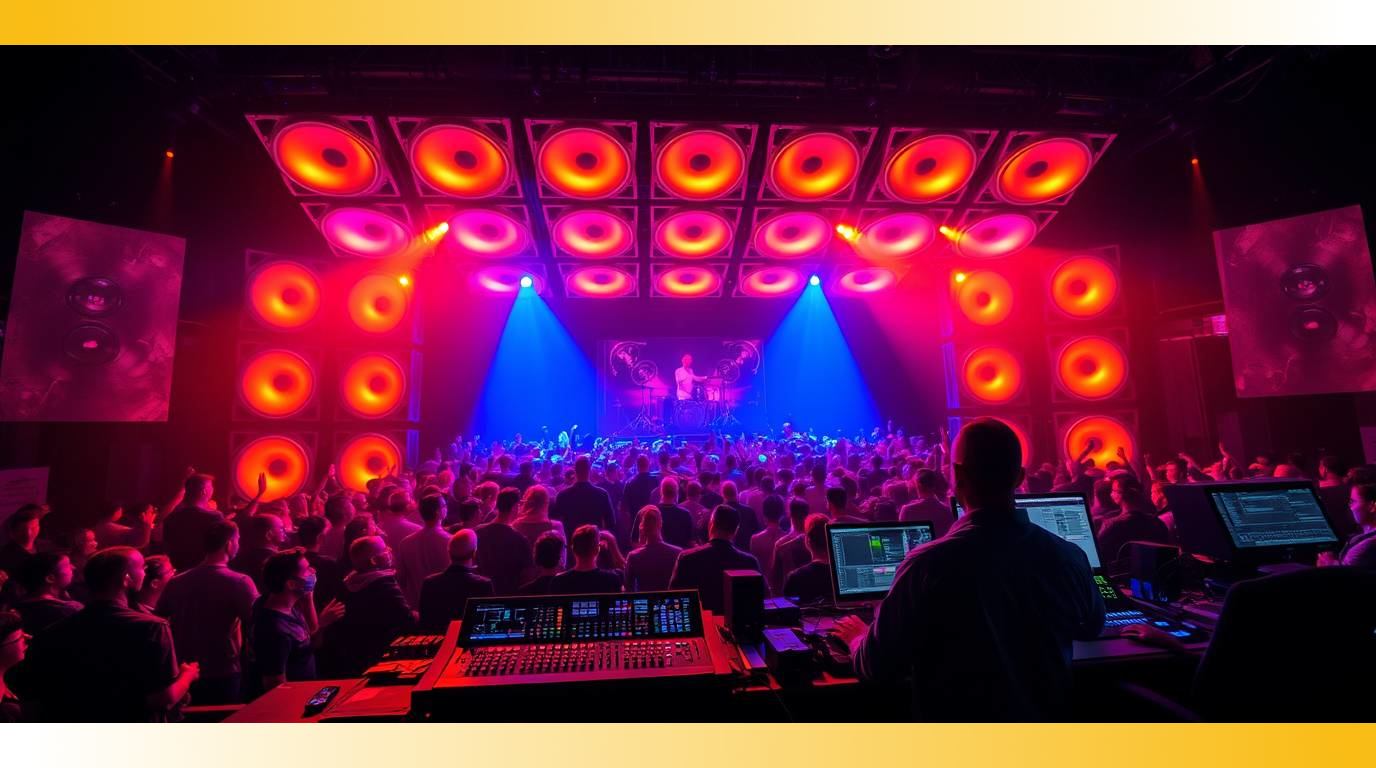
When it comes to live audio, reliability isn’t optional—it’s everything. Dropped signals, latency, and routing nightmares can derail even the best production. Networked audio protocols are your backbone for a rock solid connection. Whether you’re mixing FOH at a major event or setting up a hybrid conference, poor network infrastructure can turn your show into a support ticket.
The solution? Using modern audio networking protocols that were built for the job—Dante, AES67, and ASIO. These technologies don’t just work; they work together to give you low-latency, scalable, professional-grade control of every signal in your system.
Let’s walk through how these audio protocols are changing the game for live sound engineers and installers alike.
The Audio Protocol Power Trio: Dante, AES67, and ASIO
Dante: The industry darling for good reason. Developed by Audinate, Dante sends uncompressed, multi-channel digital audio over standard Ethernet networks with zero dropouts and low latency. Ideal for live venues, theaters, churches, and multi-room installs.
AES67: Think of it as the universal translator of audio networking. It allows devices from different manufacturers and protocols to speak the same language. AES67 is your ticket to interoperability across gear.
ASIO (Audio Stream Input/Output): This one’s your rock-solid connection on the software side. ASIO minimizes latency between your DAW or digital mixer and your hardware. AMP by NLE taps into ASIO to deliver blazing-fast performance.
Pro Insight: Don’t just stack gear—build your network around gear that speaks Dante and AES67 natively. Bonus points if your system leverages ASIO for ultra-responsive control.
AMP by NLE: Built for Modern Audio Networks
AMP isn’t just compatible with Dante, AES67, and ASIO—it’s optimized for them.
Whether you’re integrating stage boxes, external I/O, or remote control surfaces, AMP allows you to tie everything together without introducing bottlenecks or routing complexity. It runs on off-the-shelf computers and interfaces, giving you full flexibility without locking you into proprietary hardware.
Runs across tablets, touchscreens, and laptops
Supports multi-screen workflows over wired and wireless
Gear Recommendation: For bulletproof Dante integration, pair AMP with RME Digiface Dante or Focusrite RedNet gear.
Why Audio Protocol Matters: Clean, Reliable Sound
Audio networking isn’t about cables anymore—it’s about confidence.
With the right audio protocols and tools like AMP, you don’t have to guess where your signal is going. You know. That means more time mixing and less time troubleshooting.
And when every word counts—from keynotes to Q&As to livestreams—that reliability becomes your competitive edge.
Explore More:ProSoundTraining.com has incredible resources on networked audio, gain structure, and system layout. Worth bookmarking.
⚡ Quick Tips for Audio Network Success
Label Every Endpoint: Logical names = faster troubleshooting.
Use Managed Switches: Enable QoS and VLANs for Dante.
Clock Wisely: Choose one master clock and stick with it.
Test Before Show Time: Run full signal paths pre-event.
Bonus Tip: Store backup scenes on local and remote devices. Just in case.
Your Next Step: Build a System That Just Works
If your audio setup still feels like a balancing act of luck and hope, it’s time to upgrade. AMP, paired with the right protocols, gives you confidence, clarity, and control.
Let’s take your live audio game to the next level.
In a world of corporate presentations, conferences, TED-style talks, and high-stakes panel events, there’s one truth that every live voice audio engineer knows:
If the voice isn’t clear, the message is lost.
You’ve got one shot to get it right—because unlike studio takes, live speech can’t be re-recorded. And in dynamic, unpredictable environments, clarity is everything. That’s where the right VST plugins—running in real time through a platform like AMP by New Life Electronics (NLE)—make all the difference.
Let’s break down how real-time vocal processing with VSTs can take your spoken-word events from average to exceptional.
Why VSTs Belong in Your Rig
Traditionally seen in studio workflows, VST (Virtual Studio Technology) plugins are now showing their value in real-time live environments thanks to platforms like AMP. With modern low-latency DSP and host systems, you can apply surgical vocal enhancements without introducing noticeable delay.
Here’s what that means for your next event:
Instantly clean up mic bleed or harsh sibilance
Add presence and warmth without overloading your PA
Handle unpredictable presenters with dynamic control tools
And the best part? It all happens quietly behind the scenes, making even mediocre mics and tough rooms sound polished and professional.
VST Plugin Essentials for Spoken Word Events
Here’s a pro-tested chain that works wonders for clarity, warmth, and intelligibility:
De-Esser – Tames piercing “S” and “T” sounds without dulling the voice.
Dynamic EQ or Multiband Compressor – Reacts only where needed, tightening up frequency build-ups.
Noise Gate – Controls ambient noise when the speaker isn’t talking.
Transparent Compressor – Smooths out level spikes for better gain control.
Limiter – Final safety net to protect your PA from peaks.
Pro Insight: Look for plugins from brands like FabFilter, Waves, and MeldaProduction—they offer live-stable builds and zero-latency modes perfect for FOH use.
AMP by NLE: A Live Engineer’s Secret Weapon in the Live Voice Production
Running all this processing live requires power and control—and that’s exactly where AMP by NLE shines.
AMP allows you to host and automate real-time VST chains across multiple inputs, with near-zero latency and total routing flexibility. Whether you’re on a laptop or managing a full front-of-house touchscreen rig, AMP scales with your setup.
Compatible with:
Dante, AES67, ASIO networks
Off-the-shelf audio interfaces and control surfaces
Touchscreen workflows and portable control devices
So yes—you can now EQ a keynote speaker’s lav mic from your tablet… while walking the venue.
Check This Out: Want to understand room acoustics and speaker clarity better? ProSoundTraining.com offers deep dives on system tuning and vocal intelligibility. Bookmark it.
⚡ Quick Tips for Real-Time Vocal Polish
HPF Every Mic: Start with a high-pass filter around 80Hz to kill rumble.
Sidechain Compression: Control music bed levels automatically when someone speaks.
Snapshot Scenes: Store presets for different panelists or mic types.
Latency Budget: Keep total VST chain latency under 5ms for natural speech.
Gear Recommendation: Pair AMP with RME or Focusrite interfaces for rock-solid ASIO performance.
Final Word on Live Voice: Clean Voice Is Clear Authority
A clean vocal mix is more than a technical win—it’s the key to delivering ideas with impact. With AMP and the right set of VSTs, you don’t just capture the moment—you shape it.
Let your speakers focus on what they say. Let you handle how it’s heard.
Do You Need Chest-Rattling Bass, or Just Better Sound?
You’ve felt it—that deep, booming bass that shakes your ribs and electrifies the room. But here’s the real question: Is deep bass essential, or just impressive? In live sound, broadcast, and even studio setups, bass can make or break your mix. Done right, it delivers power and emotion. Done wrong, it muddies your clarity and ruins intelligibility.
Let’s separate myth from must-have, and break down what deep bass really does for your mix, your system, and your audience.
1. What Deep Bass Actually Adds to Your Mix
Bass isn’t just about boom—it’s about body. Well-controlled low end provides foundation and fullness, giving your mix weight and warmth. Whether you’re mixing FOH, monitoring, or in a studio, bass communicates emotion in a way no other frequency range can.
But without control? You get mud, masking, and unhappy listeners.
Pro Insight:
Most of the energy in a kick or bass guitar lives in the 50–120Hz range. But excessive boost below 40Hz? That’s just subsonic sludge unless you’re tuning for EDM or theater effects.
2. When (and Where) You Don’t Need Boomin’ Bass
Small venues, corporate presentations, houses of worship—these aren’t always bass-heavy environments. In these spaces, clarity, speech intelligibility, and musical definition often matter more than jaw-rattling sub energy.
You still need solid low end, but not the kind that overloads the room or shakes loose ceiling tiles.
Gear Tip:
Use high-pass filters (HPFs) on vocal and speech channels to clean up the mix and avoid unnecessary low-end buildup.
3. Designing Your System for Smart, Deep Bass
More subwoofers isn’t always the answer. Strategic placement, phase alignment, and proper tuning matter far more. Deep bass should support—not swamp—your system.
With AMP by NLE, tuning your bass is easier than ever. Use visual metering and networked DSP to dial in exactly the response you want. Compatible with Dante, AES67, and ASIO, AMP lets you shape your system with precision and flexibility.
Check This Out:
ProSoundTraining.com offers incredible deep-dives on system alignment, subwoofer array tuning, and low-frequency management. Highly recommended for engineers who want surgical control of their low end.
4. Mixing for Impact, Not Just Volume
Remember: Bass isn’t just about volume—it’s about presence and timing. A mix that hits hard but doesn’t overpower is always more effective than a wall of undefined rumble.
AMP gives you detailed control over delay, EQ, phase, and routing—so your bass is felt, not fought. It’s also fully touch-compatible, perfect for front-of-house or mobile tuning on the fly.
Quick Takeaways:
Tight low end beats big low end.
Use high-pass filters strategically.
Tune your system to the room, not just the genre.
Invest in DSP control, not just hardware.
Want Better Bass Without the Guesswork?
Boom doesn’t mean better. It means balance. Let our team help you design or upgrade your system to get powerful, clear, and musical bass—tailored to your space.
Are Phase and Polarity Causing Your Mixes To Fight Themselves?
Have you ever nailed the EQ, locked in the compression, and still felt like your mix was missing something? Chances are, the culprit isn’t your plugins—it’s your phase and polarity. These two often-overlooked concepts can make or break your sound, whether you’re behind the console at a live show or fine-tuning a studio track.
Phase and polarity issues can lead to weak bass, hollow vocals, or that frustrating “something’s off” feeling. But don’t worry—we’ll break it down in a way that’s as painless as flipping a polarity switch. Ready to hear your mixes with clarity and impact? Let’s dive in.
What’s the Difference Between Phase and Polarity?
Polarity is simple: it’s the direction of the audio signal’s voltage. Flip the polarity, and you’re essentially turning the waveform upside down. This is typically a 180-degree shift.
Phase, on the other hand, is all about timing. Two signals can have the same polarity but be out of sync—causing phase cancellation that makes your mix sound thin or muddy. Understanding how these concepts interact is key to cleaning up your sound.
Real-World Example: If you’ve ever mic’d a snare top and bottom and didn’t flip the polarity on one, you’ve likely heard that nasty comb-filtered sound. That’s phase and polarity teaming up to ruin your day.
How to Spot and Solve Phase Problems
Use Your Ears First – Is something suddenly missing when you add a second mic or track? Trust your gut.
Flip It and Listen – Most consoles and DAWs have a polarity switch (Ø). Toggle it and listen for tighter low end or clearer mids.
Check Waveforms – In your DAW, zoom in. Are your transients aligned? If not, you may need to nudge or delay tracks slightly.
Phase Alignment Tools – Plugins like Auto-Align or Little Labs IBP can do the heavy lifting for more complex phase issues.
Pro Insight: Multi-mic setups are a breeding ground for phase problems. When miking drums, guitar amps, or even choirs, always check for phase coherence.
Polarity Fixes You Can Apply Today
Flip the polarity on one mic when miking both sides of a drum or amp.
Test PA speakers individually—make sure they push air forward at the same time.
Remember: digital polarity issues can sneak in from miswired cables or improper DAW routing.
Quick Tips (Aside Blocks)
✨ Pro Tip: Always solo your low-end elements together (kick, bass, subs) and test polarity flips for maximum punch.
🔍 Gear Check: Keep a cable tester and polarity checker in your kit. Bad wiring = bad phase.
🎓 Learn More: Want to master phase alignment techniques? Check out SynAudCon’s training programs for in-depth courses.
Keep Your Mixes in Phase—and in Demand
The difference between a muddy mix and a professional one often comes down to phase and polarity. It’s not glamorous, but it’s foundational. Nail these fundamentals, and everything else—from EQ to FX—just works better.
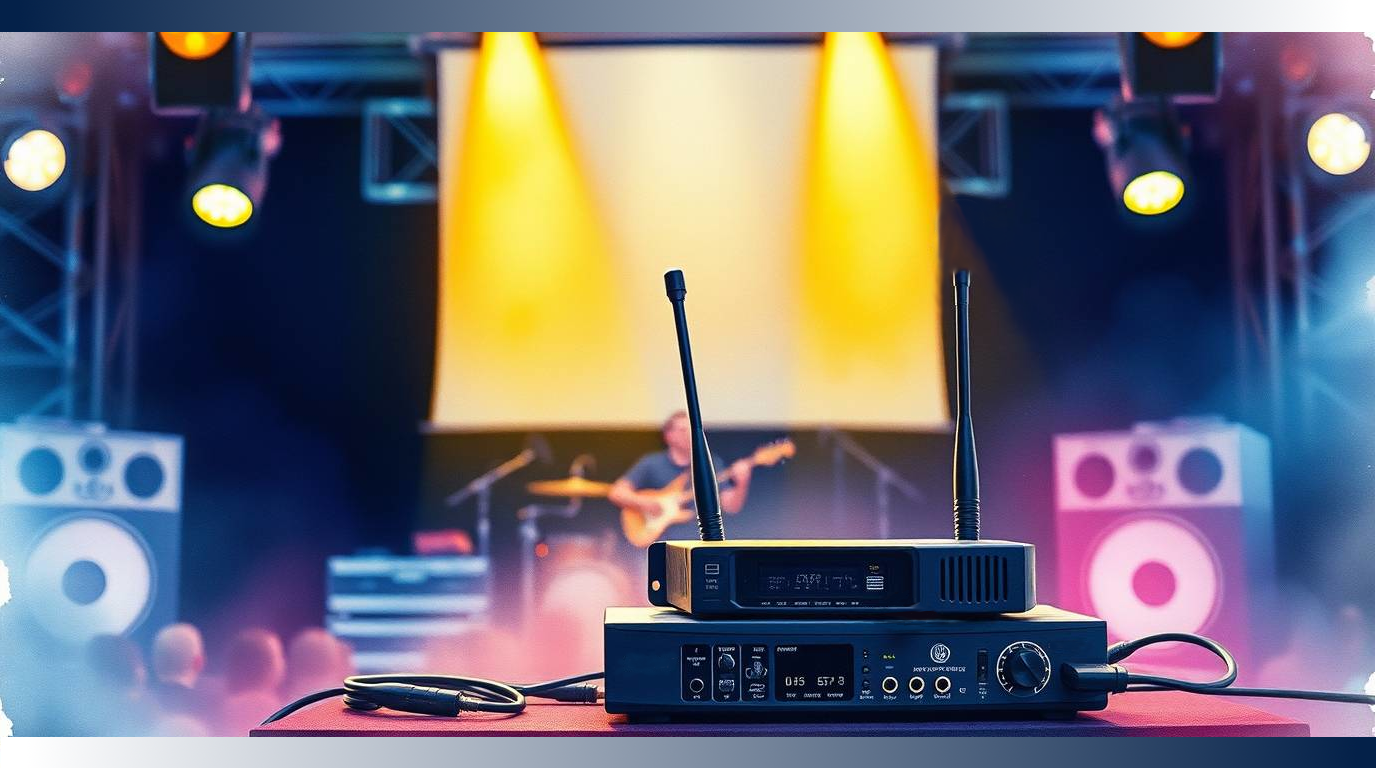
You’re in the middle of a set, a keynote, or a wedding toast—and poof, your mic cuts out. Again. Wireless drop out is frustrating, embarrassing, and worst of all, preventable. Whether you’re a live sound tech, installer, or performer, understanding why your wireless mic keeps dropping signal (and how to fix it) can save your show—and your sanity.
Let’s decode the common causes and arm you with fixes that actually work.
1. Frequency Chaos: You’re Not Alone on the Airwaves
Wireless microphones operate in shared frequency bands. That means you’re often competing with everything from TV stations to Wi-Fi routers. If you don’t scan and lock in a clear frequency, expect interference.
Pro Insight: Most dropouts happen when someone else turns on a device nearby. Scan again if the environment changes.
Fix It Fast:
Always do a frequency scan at the venue
Use diversity receivers for better reliability
Avoid crowded bands like 2.4 GHz when possible
2. Weak Batteries = Weak Signal – Eliminating Wireless Drop Out with Real Power
Sounds simple, but low battery power is one of the top culprits behind sudden dropouts. Even rechargeable batteries degrade over time.
Fix It Fast:
Use fresh alkaline or high-quality rechargeable batteries
Don’t mix brands or types in the same unit
Monitor battery levels closely with software or displays
Quick Tip: Label and rotate your rechargeable batteries to track aging.
3. Antenna Positioning Matters More Than You Think – Eliminating Wireless Drop Out by Sight Seeing
Antenna placement is often an afterthought—but it shouldn’t be. Obstructions, improper spacing, and bad orientation can all lead to signal loss and consequently, wireless drop out.
Avoid placing transmitters near metal or digital gear
Gear Recommendation: Try remote antennas or directional paddles for cleaner reception.
4. It’s Time for a System Upgrade – Eliminating Wireless Drop Out by Moving On
Older wireless systems may not be compatible with current FCC rules—or with your growing channel count. If you’re constantly troubleshooting, your gear might be the problem.
Fix It Fast:
Invest in digital wireless systems with encrypted transmission
Choose brands with robust scanning and frequency agility
Make sure your system supports the current UHF band (470–608 MHz in the US)
✅ Educate your team on basic wireless dos and don’ts
✅ Keep spares: batteries, cables, antennas, and backups
Don’t Let Dropouts Drop Your Reputation
A great mic mix means nothing if the signal isn’t rock solid. Stay ahead of dropouts with smart scanning, better placement, and reliable gear. And when it’s time to upgrade or troubleshoot, our expert team is here to help.
Cutting the Cord: The Wireless Audio Evolution Is Just Getting Started
From tangled mic cables to ultra-clear, latency-free wireless transmission, the world of pro audio has come a long way. One major feature of the audio landscape is the wireless audio evolution. If you’ve been in the sound game long enough, you’ve seen wireless tech go from “maybe” to mission-critical. But what’s next? And more importantly—are you ready for it?
Whether you’re mixing live gigs, engineering in the studio, or wrangling multiple in-ear monitors on tour, understanding how the wireless audio evolution could be your edge. Let’s dive into where we’ve been, where we’re going, and how to stay ahead of the interference.
A Quick History of Wireless Audio Evolution: 40 Years of Innovation
To truly appreciate where we’re headed, it helps to know where we started. Here’s a look at how wireless audio tech has evolved over the past four decades:
1980s – Early VHF Systems (174–216 MHz)
The wireless mic scene kicked off in earnest in the ’80s, using VHF (Very High Frequency) bands. These systems worked—but were notorious for interference, short range, and limited audio fidelity. You had to get creative… and very close to the receiver.
1990s – The Rise of UHF (470–698 MHz)
Enter UHF (Ultra High Frequency). Suddenly, things got clearer—literally. Systems were more stable, and the ability to squeeze more channels into limited spectrum made multi-mic setups actually doable. UHF quickly became the gold standard for professional gigs.
2000s – Digital Breakthroughs + Legal Reallocations
Digital wireless tech began to mature, offering better fidelity and encryption. But it wasn’t all good news: the 700 MHz band was auctioned off for mobile broadband (thanks, smartphones), and many legacy systems became obsolete overnight. Adapt or die, right?
2010s – 2.4 GHz and License-Free Bands Rise
Manufacturers pivoted to 2.4 GHz systems—license-free and globally available. Great news for smaller venues and international tours, but crowded with Wi-Fi and Bluetooth traffic. Many systems offered automatic frequency hopping to dodge interference.
2020s – DECT, 5 GHz, and IP-Connected Audio
New platforms like DECT (1.9 GHz), 5 GHz solutions, and IP-based wireless (like Dante over Wi-Fi) are defining the future. These systems offer massive channel counts, better range, lower latency, and smart network integration for remote control and monitoring.
📡 Fun Fact: Some new pro systems are leveraging multiple bands simultaneously, giving you a failsafe if one band gets noisy. Think of it as RF redundancy.
The Current Landscape in Wireless Audio Evolution: What’s Hot in Wireless Right Now
With more devices clogging the airwaves, pro audio engineers need smarter tools and adaptable gear. Today’s top-tier wireless systems are all about:
🎙 Dynamic Frequency Scanning – Automatically avoids interference mid-show. Yes, your wireless mic can now outsmart a rogue walkie-talkie.
📶 Networked Audio – With Dante, AES67, and other IP-based protocols, wireless audio isn’t just about sending signal—it’s about integrating seamlessly into complex digital workflows.
🔒 Encryption and Security – For broadcast and corporate gigs, signal security is non-negotiable. Modern systems offer AES-256 encryption and password protection.
📱 App Control and Monitoring – Adjust gain, monitor battery life, and change channels from your phone or tablet—no more crouching behind the stage rack mid-set.
Quick Tips for Wireless Success
🎧 Pro Tip: Always scan your RF environment before showtime. Don’t assume yesterday’s safe channel is still safe today. 🔋 Battery Life Hack: Swap out alkaline for lithium rechargeables with a known runtime profile. Fewer surprises, more control. 🎤 Gear Pick: Looking for a rock-solid wireless IEM system? Check out models with hybrid UHF/2.4 GHz failover and Dante integration.
Where Wireless Audio Evolution is Headed: Smarter, Simpler, Seamless
The future of wireless audio evolution is limitless—and intelligent. Expect AI-driven channel coordination, cloud-controlled rigs, and even real-time RF analytics. As more venues go fully digital and networked, your wireless setup needs to do more than transmit audio—it must sync with your entire system.
That’s where software-defined platforms like Audio Mixing Platform (AMP) by New Life Electronics (NLE) shine. AMP offers seamless control of wireless inputs, expandable I/O, and deep Dante and AES67 integration, making it a no-brainer for modern workflows.
Ready to Cut the Cord (the Smart Way)?
Don’t get left behind in a wireless world that’s changing fast. Whether you’re planning your next install or rethinking your live rig, we’ve got the expertise and gear to help.
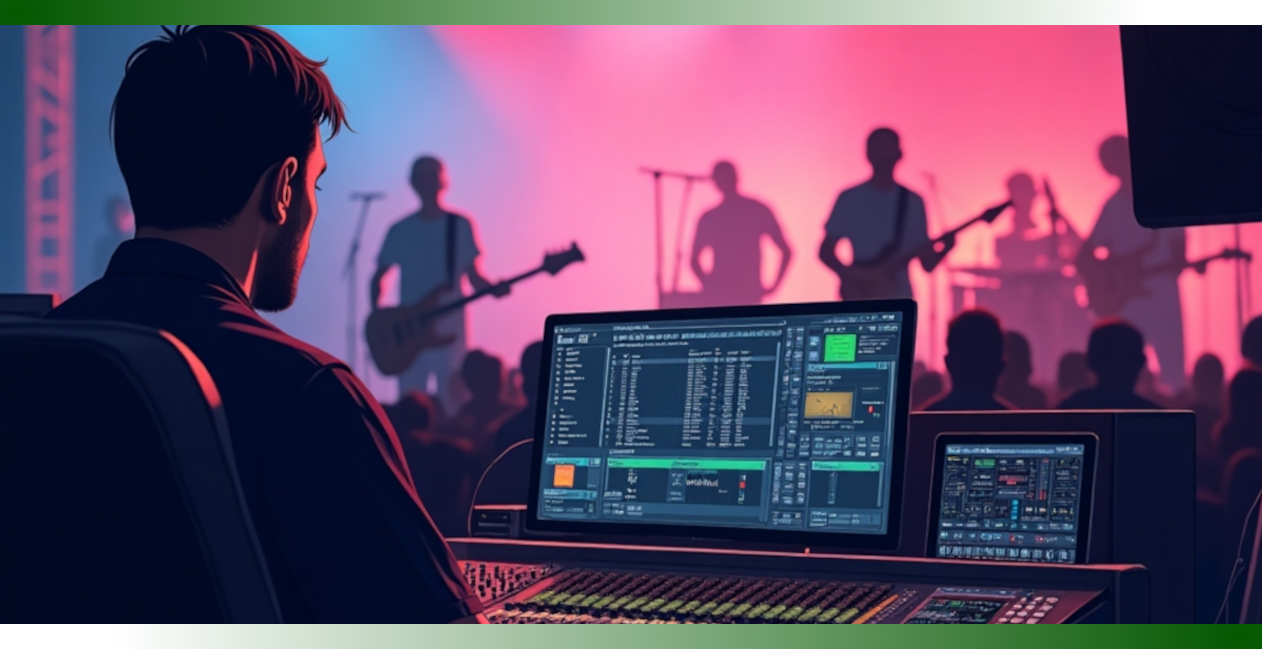
Think your current DAW setup is flawless? Think again. The world of music production is evolving at a tempo even your fastest BPM can’t keep up with. Gone are the days when you had to wrestle with clunky interfaces, limited tracks, and enough cables to make a sound engineer weep. The future of Digital Audio Workstations (DAWs) is here, and it’s rewriting the rules of recording, mixing, and mastering.
Imagine a DAW that adapts to your workflow, integrates seamlessly with your hardware, and—dare we say—makes music production actually fun. Whether you’re a seasoned engineer or just unboxing your first MIDI keyboard, understanding the latest innovations can elevate your craft from “meh” to “mix-master.” Let’s dive into what makes today’s DAWs so DAW-some.
Smarter, Faster, More Creative: The Evolution of DAWs
If you’re still using one from a decade ago, you’re essentially producing with a flip phone in the age of smartphones. Modern DAWs aren’t just about laying down tracks—they’re designed to enhance creativity, optimize workflow, and deliver studio-grade results with fewer headaches.
Key Innovations Changing the Game:
🎛 AI-Assisted Mixing & Mastering – Think of AI as your assistant engineer (minus the coffee breaks). Advanced DAWs now offer AI-driven EQ, compression, and mix suggestions, saving you hours of fine-tuning.
☁️ Cloud Collaboration – No more ‘final_final_mix_3_THISONE.mp3’ email threads. Work seamlessly with artists and engineers worldwide directly.
🖥 Touchscreen & Multi-Screen Support – Dragging sliders with a mouse? So last century. Multi-screen and touchscreen integration give you a tactile, hands-on approach.
🎤 Seamless Hardware Integration – Leading platforms like Audio Mixing Platform (AMP) by New Life Electronics (NLE) take compatibility to the next level, effortlessly working with ASIO, Dante, and AES67 network technologies for high-speed, low-latency performance.
🎶 Immersive Audio Support – With 3D and spatial audio becoming mainstream, DAWs are now equipped to handle Dolby Atmos, Ambisonics, and other immersive formats.
Pro Tips for Mastering the DAW Revolution
✅Stay Updated – New features roll out faster than plugin sales. Keep your software updated to stay ahead of the curve.
✅Customize Your Workflow – Tailor hotkeys, macros, and templates to fit your production style and save valuable time.
✅Experiment with AI – Use AI-assisted tools to enhance your mixes, but trust your ears over algorithms.
✅Leverage Cloud Storage – Back up your projects to the cloud so you never lose that ‘perfect take.’
✅Integrate the Right Hardware – Use expandable I/O interfaces, control surfaces, and networked audio gear to unlock the full potential.
The Future is DAWsome – Are You Ready?
Music production is no longer limited by clunky software or outdated workflows. With AI, cloud collaboration, and intuitive integration shaping the future, there’s never been a better time to upgrade your game. Whether you’re an industry pro or a bedroom producer, these innovations will keep your creativity flowing and your mixes sounding better than ever.
Ever had a live show go south because of unexpected audio issues? Or spent hours in a studio troubleshooting a signal chain? The problem often boils down to one critical concept: signal flow. Understanding how audio moves through your system is the difference between a seamless mix and a chaotic mess.
Whether you’re running a live sound rig, a broadcast setup, or a studio environment, mastering signal flow will make your workflow more efficient, your troubleshooting faster, and your overall sound cleaner. Let’s break it down.
1. What Is Signal Flow?
Signal flow is the path that audio takes from the source (like a microphone or instrument) to the final output (such as speakers or a recording device). Every cable, processor, and mixer in between plays a crucial role.
A typical live sound signal flow looks like this:
Source (Microphone, Instrument, Playback Device)
Preamp (Boosts weak signals to usable levels)
Mixer/Console (Routes and processes audio)
Processing (EQ, Compression, Effects)
Amplifiers (Boosts signal strength for speakers)
Speakers (Final output to the audience)
In a studio, the flow might include audio interfaces, DAWs, and monitor controllers, while a broadcast setup may add streaming encoders and signal distribution networks.
2. How to Optimize the Signal Chain for Clean, Clear Audio
🔹Gain Staging is Everything One of the most critical aspects of signal flow is gain staging—setting appropriate levels at each stage to prevent distortion and noise. Start with a strong but clean signal from your source and make sure each step maintains the right balance.
🔹Keep Your Signal Path Clean
Use balanced cables (XLR, TRS) to reduce noise.
Avoid unnecessary signal processors that add latency.
Organize your cables to prevent signal interference.
🔹Use Submixes for Efficiency Grouping instruments or vocal sections into submixes before sending them to the main mix can give you better control and clarity. This is especially useful in live sound where quick adjustments are needed.
3. Common Signal Chain Mistakes (and How to Fix Them)
❌Plugging Outputs into Outputs → Always match inputs to outputs to prevent signal loss.
❌Ignoring Latency in Digital Setups → When using Dante, AES67, or ASIO-based systems, monitor for latency buildup.
❌Skipping Proper Grounding → A poorly grounded system can introduce hum and interference into your mix.
🔹Pro Tip: Want to dive deeper into system grounding and noise reduction? Check out SynAudCon’s training courses for expert guidance.
4. Building a Reliable Signal Chain for Any Setup
Whether you’re running a small club PA system or a high-end studio, setting up your signal chain properly ensures consistency and reliability.
Live Sound Example: 🎤 Mic → Preamp → Mixer (EQ & Compression) → Amplifier → Speakers
Studio Setup Example: 🎸 Instrument → DI Box → Audio Interface → DAW → Plugins → Monitors
By mastering these setups, you’ll be able to quickly adapt to any audio environment.
Final Takeaway: Master Signal Flow, Master Your Mix
Understanding and optimizing signal flow isn’t just for sound engineers—it’s for anyone serious about great audio. Whether you’re troubleshooting a bad mix, setting up a new system, or fine-tuning your live rig, getting this right saves time, reduces stress, and delivers better sound.
📞Need a consultation on your sound setup? Contact us today and let’s optimize your audio system for peak performance!
Making the Leap from Home Studio to Live Production
You’ve spent countless hours fine-tuning your craft in your home studio—perfecting EQ curves, dialing in compression, and layering tracks with precision. But what happens when you step into live gig production? Live production is a whole different beast, demanding quick thinking, adaptability, and technical expertise. The good news? Many of the best skills you’ve honed in your home setup can translate seamlessly to live audio.
Let’s explore the key takeaways from home production that can give you a competitive edge in live sound.
1. Gain Staging: A Universal Best Skill
One of the most critical fundamentals in both studio and live sound is gain staging—ensuring proper input levels at every step of the signal chain. Whether you’re tracking in a DAW or mixing a live band, the goal remains the same: optimize levels to avoid distortion while keeping the noise floor low.
🔹 Studio Skill: Setting proper input gain for clean recordings.
🔹 Live Translation: Balancing preamp levels to prevent feedback and maintain headroom.
✅ Pro Tip: When mixing live, leave more headroom than you would in the studio—unexpected peaks can easily distort your mix in a high-pressure environment.
2. EQ and Frequency Management: Mixing in Real-Time
In the studio, you have the luxury of surgical EQ adjustments and unlimited tweaks. Live, you must make fast, effective decisions to shape the mix.
🔹 Studio Skill: Crafting a balanced frequency spectrum over time.
🔹 Live Translation: Cutting problem frequencies instantly to avoid feedback and muddiness.
✅ Pro Tip: Learn to use parametric EQs quickly and efficiently—cut before boosting and sweep for problem frequencies.
🔹 Further Learning: Dive into frequency management with SynAudCon’s training programs to sharpen your live EQ skills.
3. Compression and Dynamics: One of the Best Skills for Taming the Live Chaos
Home producers love compression for gluing a mix together and controlling transients. In live sound, compression is crucial, but misusing it can kill the energy of a performance.
🔹 Studio Skill: Applying compression for consistency and balance.
🔹 Live Translation: Using compression carefully to control dynamic range without squashing the natural feel of live instruments and vocals.
✅ Pro Tip: For live vocals, use a gentle ratio (3:1 to 4:1) with a slow attack to keep things natural without over-compressing.
4. Routing and Signal Flow: Mastering the Tech is Another of Your Best Skills
Your knowledge of buses, aux sends, and signal routing in the DAW translates directly to understanding live mixing consoles.
🔹 Studio Skill: Sending tracks to effects buses for reverb and delay.
🔹 Live Translation: Using aux sends for monitor mixes, effects processing, and submixes in a fast-paced environment.
✅ Pro Tip: Get hands-on experience with live consoles before the gig—each brand has its own workflow quirks.
5. Critical Listening and Adaptability is One of the Best Skills You Have
Perhaps the most vital skill a home producer brings to live production is the ability to listen critically and adapt on the fly. In the studio, you fine-tune details over time. In live sound, you must make instant decisions to compensate for room acoustics, crowd noise, and unpredictable performance variations.
🔹 Studio Skill: Fine-tuning tracks over multiple playback systems.
🔹 Live Translation: Quickly identifying mix issues and adjusting in real-time.
✅ Pro Tip: Train your ears by mixing in different environments—practice EQ adjustments in challenging acoustic spaces to prepare for unpredictable venues.
Final Takeaway: Your Home Studio Skills Are Your Secret Weapon
Transitioning from home production to live sound doesn’t mean starting from scratch. Your knowledge of gain staging, EQ, compression, routing, and critical listening gives you a massive head start. The are some of the best skills that crossover into the live environment. The key is to adapt your workflow to the fast-paced, high-pressure nature of live audio.
📞 Need a professional live mix engineer? Contact us today to book a consultation!
Nothing disrupts a live performance faster than bad sound. Whether it’s muffled vocals, piercing feedback, or instruments drowning each other out, a poor audio mix can turn an amazing show into a frustrating experience for both performers and the audience. A good sound check makes all the difference.
That’s why a well-executed live sound check is essential for every live performance. It’s not just about turning knobs and adjusting levels—it’s about crafting an audio experience that elevates the performance. From setting the right balance between instruments to ensuring seamless communication between the sound crew and musicians, every detail matters.
In this guide, we’ll break down the best practices for a professional live sound check, covering pre-check preparation, step-by-step execution, and expert techniques to avoid common pitfalls. And if you want a flawless sound without the hassle, our team of expert live sound engineers is ready to deliver. Let’s dive in.
1. The Purpose of a Sound Check: Why It’s Essential for Every Live Event
A live sound check isn’t just a quick mic test—it’s the foundation of an incredible performance. A proper sound check ensures that every instrument, microphone, and speaker is fine-tuned for clarity, balance, and power. Without it, even the most talented performers can be undermined by technical issues like feedback, muffled vocals, or uneven sound levels.
Why a Sound Check is Non-Negotiable
A thorough pre-show sound check guarantees:
Consistent sound levels across all instruments and vocals, ensuring nothing gets lost in the mix.
Clear, distortion-free audio for both the audience and performers.
Elimination of feedback and unwanted noise before the show starts.
A seamless listening experience that enhances audience engagement.
Skipping this step can lead to avoidable technical failures that could ruin an otherwise perfect performance. Whether you’re hosting a concert, corporate event, or house of worship service, a properly executed sound check makes all the difference.
2. Pre-Sound Check Preparation: Setting the Stage for Success
A flawless live sound check starts long before the first mic is tested. The best sound engineers know that a successful live performance depends on careful planning. Proper pre-show preparation is what separates a smooth setup from a chaotic scramble. Skipping this step leads to technical issues that could have been avoided. Here’s how to get everything in place before the full sound check process begins.
Before any musician steps on stage, every piece of audio equipment should be tested and secured. This means:
✅Inspecting all cables for loose connections or damage. Faulty cables are a major cause of live sound failures.
✅Checking microphones for proper placement and function. Poorly positioned mics lead to unwanted noise and feedback.
✅Testing DI boxes, amps, and power sources to prevent unexpected dropouts during the performance.
✅Configuring the PA system for even coverage throughout the venue to ensure crystal-clear sound for every audience member.
Pro Tip: Have a pre-show checklist to ensure nothing is overlooked. A minor issue during setup can become a major problem once the show starts.
2. Line Check: Every Input Matters in the Sound Check
A line check is different from a full sound check. It’s a quick, technical pass-through of every instrument, mic, and input to confirm everything is routed correctly. Each signal is tested one by one, starting with drums and moving through bass, guitars, keyboards, vocals, and any playback tracks.
Skipping a proper line check can lead to:
Dead channels that don’t transmit sound.
Misrouted audio, where instruments or vocals go to the wrong speakers.
Feedback surprises that are much harder to fix once the show begins.
A few extra minutes here can save hours of troubleshooting later and ensure a seamless live performance.
3. Understanding Venue Acoustics: The Room is an Instrument
Every live sound venue has its own acoustic challenges. A club, theater, or outdoor festival will all respond to sound differently. Before the full live sound check, make sure to:
Walk the venue and identify reflective surfaces that could cause echo or sound distortion.
Locate dead spots where audio might drop out and adjust speaker placement accordingly.
Adjust PA system settings to ensure balanced sound distribution throughout the space.
For outdoor events, consider factors like wind and environmental noise when placing speakers and setting levels. For static venues like a house of worship or concert hall, most of these issues should have been addressed when sound system installation was done. However, periodically checking the space helps identify new challenges—like a dead channel, blown speaker driver, or unexpected sound reflections from new signage or structures.
4. Clear Communication: The Key to a Smooth Sound Check
A great sound check isn’t just about gear—it’s about teamwork. The sound crew, musicians, and event organizers need to work together efficiently. Set clear expectations for:
The sound check schedule so everyone is ready on time.
Who is in charge of communicating adjustments (this is typically the monitor engineer).
How to give feedback efficiently (hand signals, quick verbal cues, or talkback mics).
Pro Tip: Designate one person in the band or crew to communicate with the sound team. Too many voices giving instructions leads to confusion and delays.
3. The Step-by-Step Sound Check Process: Dialing in the Perfect Mix
Once the pre-sound check preparation is complete, it’s time to move into the full sound check process. This step fine-tunes all elements of the live sound system to ensure that every musician hears themselves clearly and that the audience experiences the best possible sound quality.
1. Start with Drums & Bass: Building the Foundation
The rhythm section is the backbone of any live performance. Begin by checking:
✅Snare drum – Adjust for crisp attack without overpowering the mix.
✅Toms & cymbals – Balance for clarity without excessive wash.
✅Bass guitar – Dial in deep, controlled low frequencies that complement the kick drum.
2. Layer in Guitars & Keyboards: Defining the Midrange
Once the rhythm section is solid, bring in the melodic instruments:
✅Electric & acoustic guitars – Ensure presence and clarity without clashing.
✅Keyboards & synths – Balance frequencies to avoid muddiness or sharpness.
3. Vocals Come Last: Ensuring Clarity & Projection
Finally, mix the lead and backing vocals, ensuring they:
✅Cut through the mix without overpowering instruments.
✅Have clear articulation for lyrics to be understood.
✅Are free from feedback and have proper reverb/EQ settings.
4. Monitor Mix vs. Front-of-House Mix: Balancing Sound for Everyone
A great live sound experience means balancing two separate mixes:
Monitor mix – What the performers hear on stage.
Front-of-house mix – What the audience hears.
Each musician may need different levels in their monitors, ensuring they hear themselves and the band clearly without distractions.
4. Common Sound Check Mistakes to Avoid
Even experienced teams can run into avoidable sound check mistakes that lead to frustrating audio issues during a performance. Here are some of the most common pitfalls and how to prevent them:
1. Rushing the Sound Check
Trying to speed through a sound check often results in missing critical issues like bad cable connections, improper mic placements, or imbalanced mix levels.
Solution: Schedule enough time for a thorough check and start early.
2. Ignoring Monitor Mixes to speed up the Sound Check
If musicians can’t hear themselves properly, the entire performance suffers.
Solution: Take time to dial in individual monitor mixes and ensure each performer is comfortable before moving on.
3. Failing to Account for Room Acoustics
A venue’s size, shape, and reflective surfaces impact the sound. Ignoring this can cause echo, dead spots, or feedback loops.
Solution: Adjust EQ and speaker placement to accommodate the space.
4. Not Simulating Performance Volume Levels in the Sound Check
A common mistake is checking at low levels and playing at high levels, which leads to unexpected distortion and mix imbalances.
Solution: Perform sound checks at actual performance volume for an accurate mix.
5. Poor Communication Between Crew & Performers
Miscommunication leads to unnecessary delays and confusion.
Solution: Establish clear hand signals, verbal cues, or a talkback mic system for seamless coordination between the sound team and musicians.
Avoiding these mistakes ensures a smoother, more professional sound check, reducing last-minute stress and creating a flawless audio experience for both performers and audiences.
5. Pro Tips for a Flawless Sound Check
While not every sound check scenario allows for perfection, implementing the following pro tips whenever possible can elevate your live sound to the next level. These strategies help avoid common pitfalls, improve efficiency, and enhance overall audio quality for both performers and the audience.
1. Use a Reference Track to Set a Baseline
Before making adjustments, play a high-quality reference track through the PA system. This helps sound engineers:
✅Identify frequency imbalances in the venue.
✅Set a baseline for EQ and speaker tuning.
✅Ensure the system produces clear, full-range sound before adding live elements.
2. Sound Check at Performance Volume
One of the biggest mistakes is conducting a sound check at low levels, only for the band to play much louder during the show. This leads to:
Unexpected distortion.
Changes in mix balance.
Sudden feedback issues.
Solution: Always run a portion of the sound check at full performance volume to replicate real conditions.
3. Optimize Mic Placement and Isolation
Proper microphone technique can drastically improve clarity and reduce feedback:
✅Use directional mics to minimize bleed from other instruments.
✅Position mics at optimal distances for best pickup and minimal handling noise.
✅Ensure vocalists maintain consistent mic technique to avoid volume fluctuations.
4. Use a Talkback Mic for Efficient Communication
In larger venues or professional setups, a talkback microphone at the mixing console allows the sound engineer to communicate directly with performers. This:
✅Reduces confusion during sound check.
✅Speeds up troubleshooting.
✅Creates a smoother, more professional workflow.
5. Save Presets for Consistency
For venues hosting recurring events, saving mix presets for different bands or speaker configurations can be a game-changer. Digital mixers allow engineers to:
✅Recall previous settings instantly.
✅Reduce sound check time significantly.
✅Maintain consistent sound from one performance to the next.
6. Test Wireless Frequencies to Avoid Interference
If using wireless microphones or in-ear monitors, interference can disrupt an otherwise perfect show. Before starting sound check:
✅Scan for open frequencies.
✅Assign and lock frequencies to prevent unexpected drops.
✅Keep backup wired options in case of interference issues.
7. Simulate a Full Band Mix for Better Balance
Rather than testing one instrument at a time, have musicians play together in small sections. This helps engineers:
✅Adjust EQ and levels in real-time.
✅Balance the mix holistically instead of in isolation.
✅Catch problems early before they become show-stopping issues.
8. Record and Review Sound Check for Adjustments
If time permits, record a section of the sound check and play it back through the PA. This allows for:
✅Identifying tonal issues that might not be noticeable in real-time.
✅Making final EQ tweaks to enhance clarity.
✅Ensuring the sound is well-balanced for both the audience and performers.
By implementing any of these advanced sound check techniques, you’ll create ever more professional, polished, and consistent live sound experiences.
Why Professional Sound Engineers Make the Difference
Even with the best gear and preparation, achieving flawless live sound requires experience, precision, and real-time problem-solving. This is where professional sound engineers make all the difference.
1. Expertise in Audio Balancing & Troubleshooting
Professional sound engineers bring years of experience in balancing frequencies, optimizing mixes, and preventing technical failures. Their trained ears can detect and correct issues that an untrained person might miss, such as:
✅Fine-tuning EQ settings to eliminate muddiness and enhance clarity.
✅Identifying feedback sources and making instant adjustments.
✅Ensuring the right blend between instruments and vocals for a polished, professional mix.
2. Real-Time Adjustments for a Seamless Performance
A live performance is unpredictable—levels change, equipment malfunctions, and environmental factors shift. A professional sound engineer:
✅Continuously monitors and adjusts the mix throughout the performance.
✅Handles unexpected technical issues without disrupting the show.
✅Works closely with performers to ensure optimal monitor mixes, reducing on-stage distractions.
3. High-End Equipment Knowledge & Proper Use
The best audio gear won’t deliver great sound unless configured and operated correctly. Professional engineers:
✅Know how to maximize the potential of mixing consoles, wireless systems, and PA setups.
✅Select and position microphones and speakers for the best possible coverage.
✅Manage complex sound system setups in large venues and outdoor spaces.
4. The Key to a Stress-Free Event
Hiring a professional sound engineer means less stress for performers, event organizers, and production teams. Instead of worrying about technical issues, you can focus on delivering a great show while knowing the sound is in expert hands.
Want flawless live sound for your next event? Our expert sound engineers specialize in creating crystal-clear mixes, eliminating audio issues, and ensuring a seamless experience from setup to performance. Contact us today to learn more!
Conclusion: Bring Your Sound to Life with Professional Expertise
A proper live sound check is the difference between a show that sounds good and one that sounds incredible. By following these best practices, you ensure a seamless performance, happy musicians, and an engaged audience.
But why take chances with your event’s sound? Our team of expert live sound engineers specializes in flawless sound setup, mixing, and troubleshooting, so you can focus on the performance while we handle the technical details.
Don’t leave your sound to chance—contact us today and let’s make your next event unforgettable!
If you need training on your time, head over to SynAudCon. They will help you get the best sound for your events.